
Understanding Docker Volumes
Using docker volume properly will lead to higher productivity. Let's take a deep dive into docker volume & its configuration options.


Today I wanted to do a deep dive into the Docker Volumes.
Why? Because this is what kept me confused for a long time and stayed as a mental block for my entrance to the Containerization world.
For the containers, you can skip mentioning the volume while creating the container, and Docker will manage the files generated by the container internally. It works well if you want to avoid doing anything with the data.
But it could be better. We want to be able to take this data somewhere and reproduce the application state.
This is where the Docker volumes come into play.
Benefits
Here are some benefits of using Docker Volumes:
- It allows us to peek into the container's filesystem on the subset of the container.
- Serves the purpose of portability of the containers.
- Volumes are mounted by default, but by explicitly mentioning/mounting them, we can take data and use it later to recreate the application/container state.
Let's create a simple Volume:
docker volume create appVolume
Now, this volume can be used when running the container image:
docker run -v appVolume:/app/data -it myApp
This will attach the appVolume volume to the container running the image tagged as myApp.
-vis a shorthand for--volume
And we can see the list of volumes created with the following command:
docker volume ls
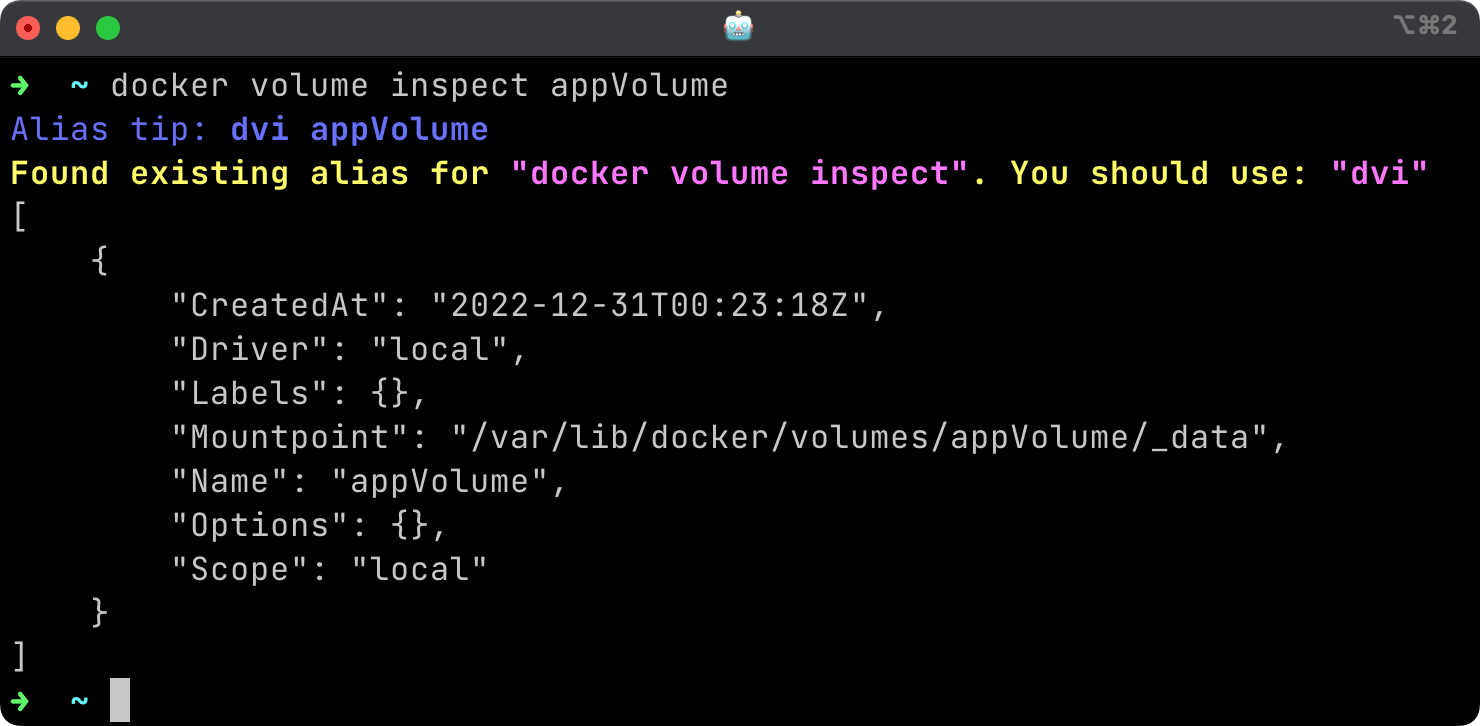
Along with that, if you want to see the internal details of the volume, you can do so with the following command:
docker volume inspect appVolume
Which should show output like the following:
Volumes with --mount flag
As in the above example of attaching volume with the -v flag, we also have the --mount flag to do so, which allows all the options of -v. Maybe, a little bit more things than -v
So why use --mount? Because
- It is very verbose
- accepts all the parameters as
key=valuepairs - Docker services creation only works with
--mount. - Docker volume adapter parameters can only be passed with
--mount. - When used for bind mount, this flag will not create the path on the host if the source does not exist.
How to use --mount flag?
--mount flag accepts a string of key/value pairs separated by commas. A simple example will look as follows:
docker run \
  --mount source=appVolume,target=/app/data \
  -it myApp
Here are the keys and possible values you can pass for the --mount flag
type: type of mount,bind,volumeandtempfs. If nothing is mentioned,volumeit is the default value.source: source path or the volume name, and can be shortly namedsrcas welltarget: this key specifies the path of the mount inside the container file system. This key is also a synonym fordestinationanddest.readonly: this key specifies if the mounted volume should be read-only or not and can also be passed asrovolume-opt: this key can be added multiple times to give options to the volume drivers.volume-driver: The volume driver you want to use for the volume; this key is not needed in most cases. Generally, this option is used when you are creating the volume.
Volumes in docker-compose
The whole process above is excellent, but it is a manual process. And for containerised applications, it is always better to use a config file like docker-compose.yml
You can create the volumes in the docker-compose file, like in the following example.
Docker-compose commands like build would govern this volume, stop, down, etc.
...

services:
  ...
  volumes:
    - appVolume:/app

volumes:
  appVolume:
And in the same fashion, we can create the docker volume externally and use it inside the docker-compose file; as in the following example, we will try to use the docker volume appVolume created with the docker volume create ... command.
...

services:
  ...
  volumes:
    - appVolume:/app

volumes:
  appVolume:
    external: true
Volume drivers
As volumes are already allowing us to keep the application data out of the application and give us the ability to backup/restore the data.
Though, it is also a process of defining how this volume should behave outside the executing state, i.e., backing up, moving, restoring, and all sorts of operations for safekeeping.
In such cases, volume drives come into play where you can choose the nature of volume to be like
- Encrypted
- Store on cloud storage like AWS S3 or DO Spaces
- On a remote machine via SSH.
- Distributed
- etc
Here we will see an example of volume created with SSH volume driver
First, we need to install the SSH volume plugin before we can use it:
docker plugin install --grant-all-permissions vieux/sshfs
Now we can use the driver vieux/sshfs with the --driver flag:
docker volume create --driver vieux/sshfs ...
Though it is not done, we must pass options like the remote host, auth and path. We will do so with the following command:
docker volume create --driver vieux/sshfs \
  -o sshcmd=userName@<RemoteIPaddress>:/home/test \
  -o password=usersPassword \
  mySSHvolume
Now this mySSHvolume can be used in the containers as usual, with -v or --volume or --mount flag.
Conclusion
Docker volumes have been an eye-opener for me, and the more I understood, the deeper dive I took into containerisation.
Further, you can explore the Docker volumes from the perspective of multiple services.
Let me know through comments. or on Twitter at @heypankaj_ and/or @time2hack
If you find this article helpful, please share it with others.
Subscribe to the blog to receive new posts right in your inbox.